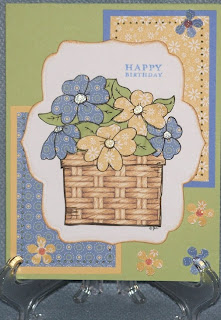
Don't like to color and love the Daisy Doodles digital images? Color no more, paper piecing is here to stay! Fun, easy, colorful (pun intended) so many different ways to incorporate digitals into your crafting life!
I was asked to be the guest designer on
Daisy Doodles. Once you are there, at the top you will see challenge blog, just click there. My pic should be on Monday's blog!
I was sent a digital image and a sketch to follow. here's the sketch:
And here's my card using 'roses'. This is a digital image that I copied out about six times and glued at least 6 layers on the larger rose to give it depth. It really looks good IRL. And it is thick. It will need an envelope box for mailing or be a hand over card. It is a 5 1/2 " square card and I'll show you the inside, too!
Here's the part where you go get your coffee, or popcorn and soda, you dieters go get a piece of gum.
There are three layers of leaves that I used to paper piece onto a scrap of green paper.
Here's a pic of all the copies I made to paper piece this rose set.
Cheryl was the sistah that got me 'hooked' on paper piecing and I will once more link you to her blog
here.
I run the plain copy paper through the printer and then tape down the paper to the portion of the pic that I want to be that color. the yellow sheet was my back up plan and that's the paper that I used. the assortment of yellows and golds that I originally chose just didn't work for me. The printed green leaves had already been cut out when I realized that i should take pics.
I use a marker to color the portion of the leaves so the yellow doesn't show. then I glue the leaves over the yellow image.
I cut the leaves out and leave (no pun intended) the middle (it will be covered) as it's easier to handle and glue down. Then i just cut out portions of the flowers and glue as I go. It can not be seen...all the layers that are there. It really is lovely IRL, but i said that already, just checking to see if you are paying attention. i painted the flowers with a Frost White shimmer once they were all dry (glue). I dripped glue down the side and added chunky glitter to the edges of the roses. A little glitter pen in some spots, just to add more sparkle. the lace was added to be included in another challenge over at
Caardvarks. here's a pic of a side view, imagine all the layers...

This is a better pic where you can see the glitter, white on the flowers and green on the tips of the leaves. All the sparkle is for a challenge over at the
Creative Cottage.
One more pic of the inside and we're almost done with this post.
I will eventually add some flowers to the inside once I decide who will be receiving this rosey card.
They're on page four
I picked yellow because I thought that I had more shades to make the roses. Emily gems says yellow symbolizes wisdom, joy, and happiness.
On that note................thanks for coming by and sharing your coffee, popcorn and soda!
RX
STAMPS: Digital image fro Daisy Doodles, Warm Words-sparkle
PAPER: Rose Red, So Saffron, Barely Banana, Dsp from Luxe designs (my stash of 'old' paper)
INK: Printer and Black Soot for Sentiment, Tim Holtz Distressed inks-antique linen
TOOLS: MS border punch-inside, paint
INCIDENTALS: Sakura glitter pen, bling from BOTD, chunky glitter, lace trim from Wright's
Some other challenges
Caardvarks - lace
Stamping Around - Anya's inspiration
The Creative Cottage - sparkle
Simon Says Stamp - spring and glitter
365 Cards - 8 elements
Lots To Do - vintage, lace
Paper Cutz - Easter


